STL to G-code: How to Convert Files for 3D Printing
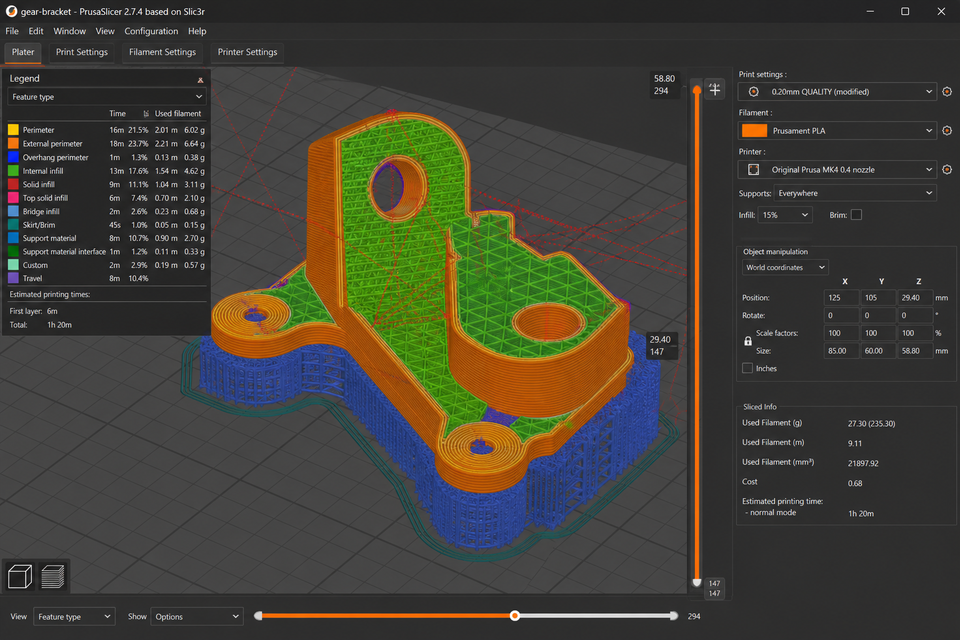
You've downloaded an STL file from Thingiverse or MakerWorld. You plug in your SD card, load the file, and... nothing happens. Your printer doesn't know what to do with it.
That's because 3D printers don't understand STL files. They speak G-code, a completely different language. The step between downloading a model and actually printing it is called slicing, and it's where your STL becomes a set of instructions your printer can follow.
This guide covers how to convert STL to G-code using free software, which slicer to pick, what settings matter, and the mistakes that trip up every beginner.
What Is G-code and Why Can't You Print an STL Directly?
An STL file describes the shape of a 3D object using thousands of tiny triangles. It tells you what something looks like, but not how to make it.
G-code is the opposite. It's a line-by-line instruction set that tells your printer exactly what to do: heat the nozzle to 200°C, move to position X50 Y30, extrude 1.2mm of filament, move to the next point, and so on. Every single movement your printer makes during a print comes from G-code.
Think of it this way: an STL file is a photograph of a finished cake. G-code is the recipe with every step, temperature, and timing written out. Your printer is the baker that can only follow recipes, not interpret photos.
The software that converts STL to G-code is called a slicer. It's called that because it literally slices your 3D model into hundreds of thin horizontal layers, then calculates the exact path the nozzle should take for each layer. The output is a G-code file your printer can execute.
How to Convert STL to G-code (Step by Step)
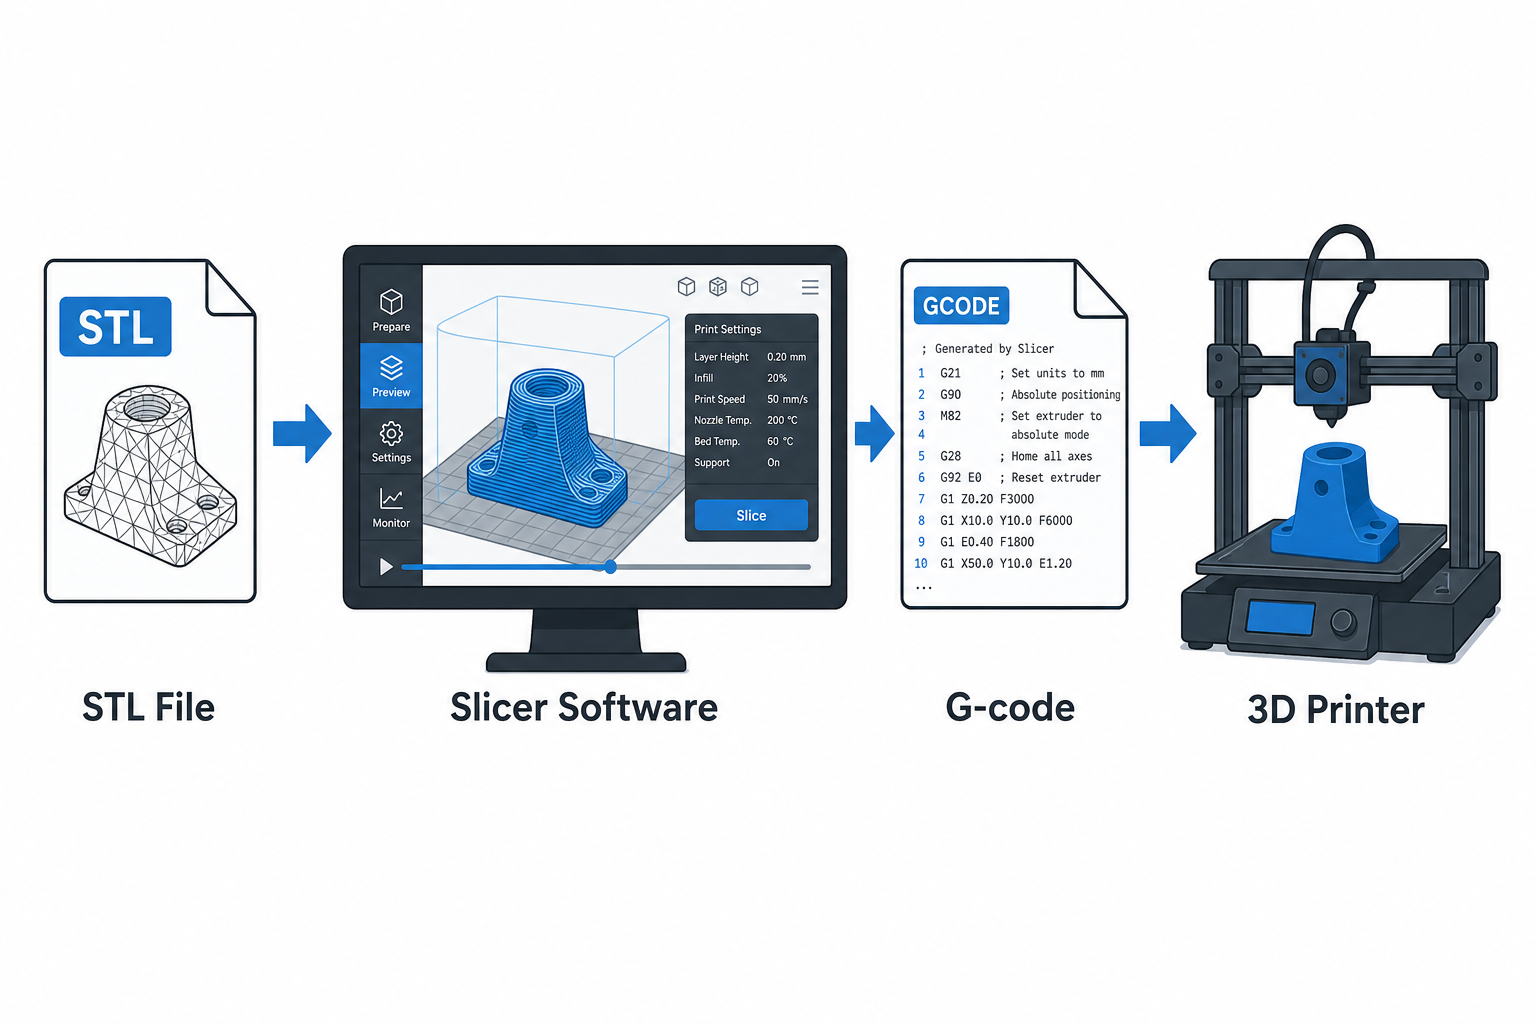
The process is the same regardless of which slicer you use:
Step 1: Install a slicer. Download one of the free options below (Bambu Studio, Cura, or PrusaSlicer).
Step 2: Select your printer. On first launch, the slicer asks which printer you have. Pick yours from the list. This loads the correct build volume, nozzle size, and default temperatures.
Step 3: Import your STL file. Drag the .stl file into the slicer window, or use File > Import. Your model appears on a virtual build plate.
Step 4: Position and scale. Make sure the model sits flat on the plate. Resize if needed. Most slicers have a "place on bed" button.
Step 5: Choose print settings. Select a preset (Draft, Normal, or Fine) or manually adjust layer height, infill density, speed, and supports.
Step 6: Slice. Click the Slice button. The slicer processes your model and generates G-code. This takes a few seconds to a minute depending on model complexity.
Step 7: Preview. Before exporting, check the layer-by-layer preview. Look for obvious problems (missing supports, weird gaps, model floating above the bed).
Step 8: Export or send. Save the G-code to an SD card/USB drive, or send it directly to your printer over Wi-Fi (if supported).
That's it. The slicer is the STL to G-code converter. No other tools needed.
Best Free STL to G-code Slicers
Every major slicer does the same core job (STL in, G-code out), but they differ in ease of use, printer support, and advanced features.
Bambu Studio
Best for: Bambu Lab printer owners (A1, P1, X1 series) and beginners who want the simplest experience.
Bambu Studio is built specifically for Bambu Lab printers but also supports third-party machines. The workflow is extremely streamlined: drag in an STL (or STEP file for even better quality), pick a preset, hit slice, and send directly to your printer over LAN. No SD card needed.
Key advantages:
- One-click network printing (no file transfer hassle)
- Auto-detects optimal settings for Bambu Lab filaments
- Built-in calibration tools
- Supports multi-color printing with AMS
Cura (by UltiMaker)
Best for: Users with Creality, Elegoo, Anycubic, or any non-brand-specific printer. The most universal option.
Cura supports over 500 printer models out of the box. If your printer exists, Cura probably has a profile for it. The interface is more complex than Bambu Studio but offers more customization.
Key advantages:
- Widest printer compatibility
- Huge settings library (500+ tweakable parameters)
- Plugin marketplace (add features like OctoPrint integration)
- Large community with shared profiles
PrusaSlicer
Best for: Prusa owners and users who want advanced features like paint-on supports, variable layer height, and organic supports.
PrusaSlicer is open-source, developed by Prusa Research but works with many other printers. It tends to be the first slicer to introduce innovative features that others later adopt.
Key advantages:
- Paint-on supports (manually place support where needed)
- Variable layer height (thick where detail doesn't matter, thin where it does)
- Excellent handling of multi-part models
- Clean, well-organized interface
Quick Comparison
Feature | Bambu Studio | Cura | PrusaSlicer |
|---|---|---|---|
Price | Free | Free | Free |
Printer support | Bambu + others | 500+ models | Prusa + others |
Beginner friendliness | ★★★★★ | ★★★★ | ★★★★ |
Advanced features | ★★★★ | ★★★★★ | ★★★★★ |
Direct network send | Yes (Bambu) | Via plugin | Yes (Prusa) |
Best for | Bambu users | Creality/Ender | Prusa / advanced |
All three are free, full-featured, and produce excellent G-code. Pick the one that matches your printer brand and you'll be fine.
STL to G-code Converter Online Free
Sometimes you can't install software, or you're on a borrowed computer. Online converters handle the STL to G-code conversion in your browser with no download required.
Available options:
- Kiri:Moto (grid.space/kiri) — Full-featured browser slicer, surprisingly capable
- SimplyPrint — Cloud-based slicing with printer management
- SlicerCloud — Basic online conversion
When online converters make sense:
- Quick one-off print with a model you've printed before
- You're on a Chromebook or shared computer
- Testing whether a model is printable before committing to a full slicer install
When to avoid them:
- First time printing a model (you need proper preview and support analysis)
- The tool doesn't have your exact printer profile (wrong bed size = crashed print head)
- Complex models with overhangs requiring careful support placement
- Anything you care about getting right on the first attempt
My honest recommendation: Install a proper slicer. It takes 5 minutes, it's free, and it gives you dramatically better results. Online STL to G-code converters are a convenience shortcut, not a replacement for real slicing software.
STL to G-code on Mobile (Android & iOS)
Yes, you can slice on your phone. Several related searches ask about STL to G-code on Android, so here are your options:
Creality Cloud App (Android/iOS) — Full mobile slicer with cloud processing. Import STL, choose settings, slice remotely, send to Creality printers.
Bambu Handy (Android/iOS) — Not a full slicer, but can trigger re-prints of previously sliced models and monitor prints remotely.
Kiri:Moto (Mobile browser) — Works in any mobile browser since it's a web app. Full slicing capability on your phone screen.
3DPrinterOS (Cloud service) — Upload STL via phone browser, slice in the cloud, download G-code.
Reality check: Mobile slicing works, but it's uncomfortable. Adjusting support placement on a 6-inch screen is painful. The best use case is re-slicing a model you've already verified on desktop with minor changes (different infill, different material). For a new model you've never printed, use a computer.
3MF to G-code: The Modern Alternative
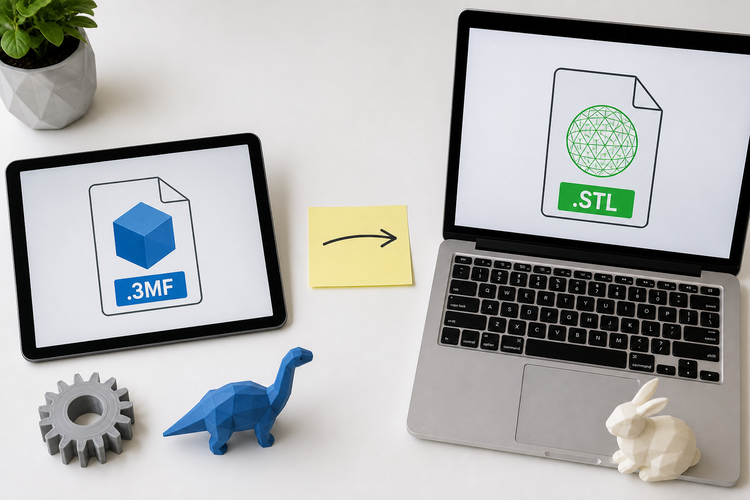
If you're downloading models from MakerWorld, Printables, or other modern platforms, you'll increasingly find 3MF files alongside STL files. Converting 3MF to G-code works identically to STL (import into slicer, slice, done), but with a significant advantage.
A 3MF file can include:
- Pre-configured print settings (layer height, infill, speed)
- Support placement already done by the designer
- Multi-color assignments for AMS/multi-material printers
- Correct scale and orientation
This means when you open a 3MF in Bambu Studio or PrusaSlicer, the model may already be perfectly configured. Just hit Slice and you're done. No guessing about supports or settings.
Tip: If a model page offers both STL and 3MF, always grab the 3MF. It saves you configuration time and gives you the designer's tested settings.
Key Settings That Affect Your G-code
When you click "Slice," the slicer turns your chosen settings into G-code instructions. Here are the settings that matter most for beginners:
Layer Height (0.1 to 0.3 mm) Thinner layers = smoother surface but much longer print time. For most prints, 0.2 mm is the sweet spot. Use 0.12 mm for detailed miniatures, 0.28 mm for fast functional parts.
Infill Density (10-30%) How solid the inside of your print is. 20% works for most things. Increase for structural parts, decrease for display models.
Supports (On/Off/Custom) Any overhang steeper than roughly 45° needs support material underneath. Your slicer can auto-generate supports or you can place them manually. Forgetting supports is the number one reason prints fail mid-way.
Print Speed Higher speed = faster print but potentially lower quality. Most slicers have presets (Draft/Normal/Fine) that handle this for you.
Printer Profile This is the single most important setting. The wrong printer profile means wrong bed dimensions, wrong temperatures, wrong motor directions. Always verify this is correct.
How to Preview and Verify G-code Before Printing
Never skip the preview step. Spending 30 seconds reviewing your sliced G-code can save you hours of failed print time and wasted filament.
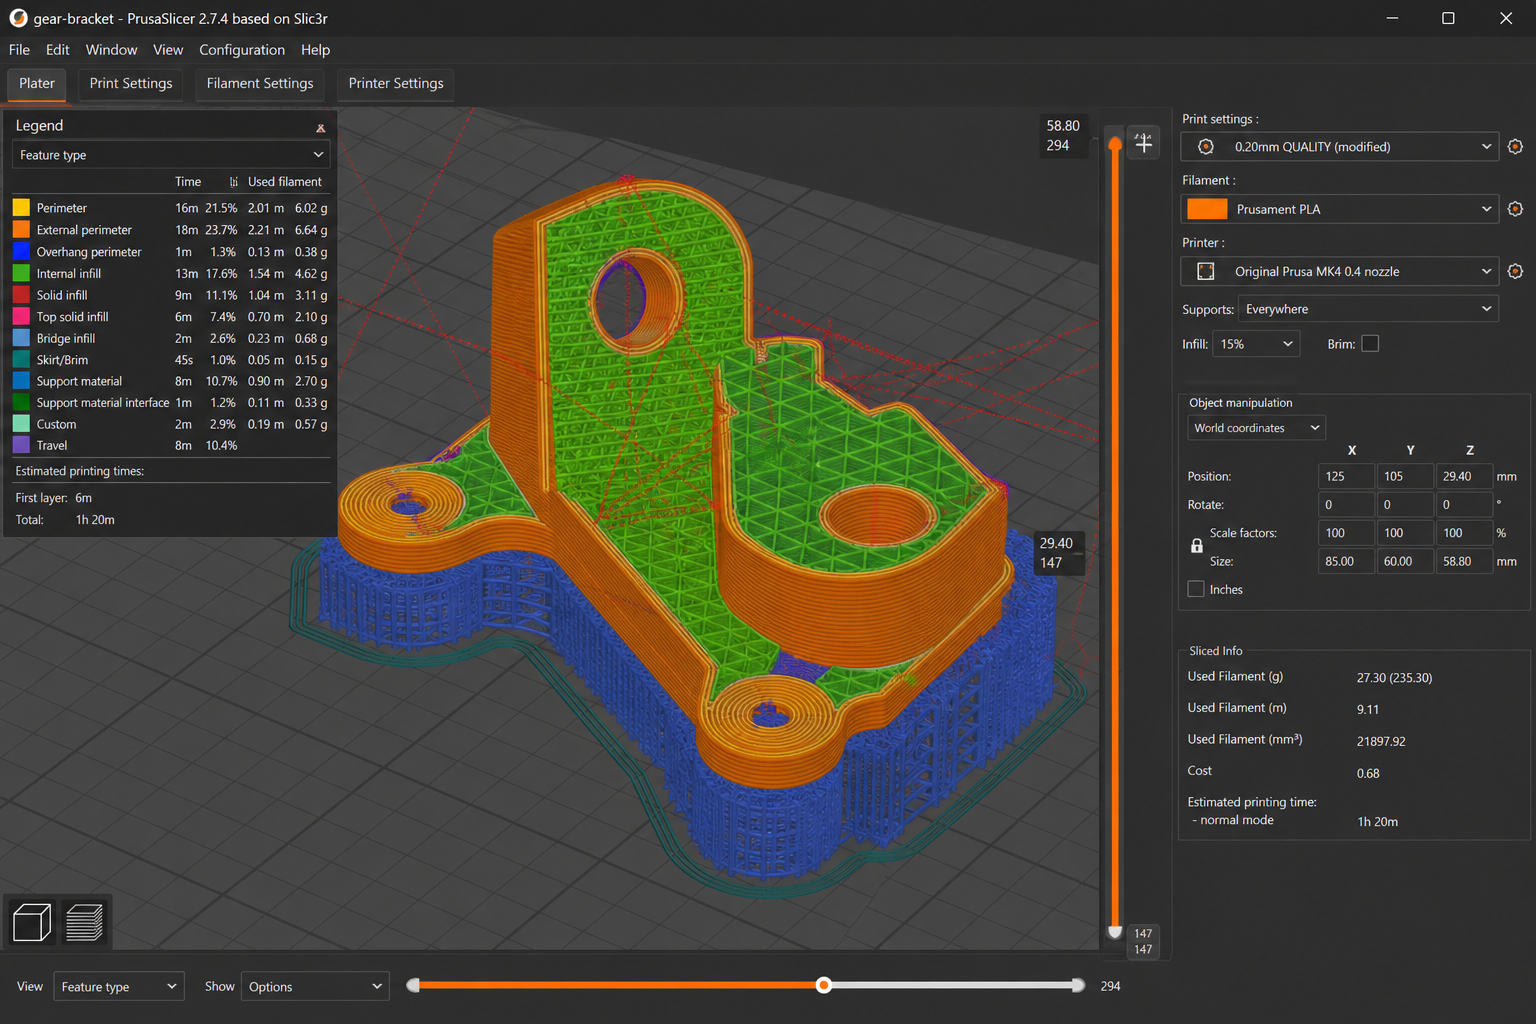
What to check in preview mode:
First layer coverage. Scrub to layer 1. Does the model make good contact with the bed? Is the brim or raft present if you enabled one? Any part floating above the plate means that section will print in mid-air and fail.
Support placement. Scrub through the layers and check that overhangs have support beneath them. Look for islands (disconnected sections of a layer with nothing below).
Infill consistency. The internal pattern should look uniform. Gaps or missing sections might indicate a mesh error in your STL file.
Travel moves. The dotted lines (travel) shouldn't cross over tall, thin features excessively, as this can cause stringing or knock over delicate parts.
Estimated time and material. Check that these are reasonable. A phone case shouldn't take 14 hours. If the estimate seems wildly off, a setting is probably wrong.
Common Mistakes When Converting STL to G-code
Wrong Printer Profile Selected
Every G-code file is generated for a specific printer. Using the wrong profile means the G-code might command the print head to move beyond the build volume, use incorrect temperatures, or reverse motor directions. Always double-check your printer selection before slicing.
Model Floating Above the Build Plate
Some STL files aren't positioned at Z=0. If your model is hovering even 0.1 mm above the virtual bed, the slicer generates G-code that starts extruding in mid-air. Most slicers have a "Drop to bed" or "Place on face" button. Use it.
Forgetting to Add Supports
Overhangs beyond 45° need support material. If you slice without supports and your model has bridges or steep angles, those sections will droop or collapse during printing. Enable automatic supports for your first few prints until you develop an eye for what needs support.
Wrong Scale or Units
STL files don't store unit information. Some modeling software exports in inches, others in millimeters. If your imported model is microscopic or enormous, it's a unit mismatch. Rescale to the correct dimensions before slicing. Most slicers will warn you if a model is unusually small.
Using Default Settings for Everything
Slicer defaults are conservative, designed to work on most models at acceptable quality. But a figurine with fine details needs different settings than a structural bracket. Spend a minute choosing appropriate layer height, infill, and speed for your specific model rather than always hitting Slice with defaults.
FAQ
How do I convert STL to G-code?
Install a free slicer (Bambu Studio, Cura, or PrusaSlicer), select your printer model, import the STL file, adjust print settings (or use a preset), click Slice, and export the generated G-code to an SD card or send it to your printer over Wi-Fi.
Can I convert STL to G-code online for free?
Yes. Browser-based tools like Kiri:Moto and SimplyPrint can slice STL files without installing software. However, these tools often lack your specific printer profile, which can cause print failures. For reliable results, a proper desktop slicer is strongly recommended.
What is the best free STL to G-code converter?
For Bambu Lab users, Bambu Studio offers the smoothest experience. For Creality/Ender printers, Cura has the widest compatibility. For advanced users who want maximum control, PrusaSlicer leads in features. All three are completely free.
Can I convert STL to G-code on my phone?
Yes, using apps like Creality Cloud (Android/iOS) or browser-based tools like Kiri:Moto. Mobile slicing works for simple re-prints but isn't ideal for complex models that need careful support placement or setting adjustments.
What's the difference between STL and G-code?
An STL file contains the 3D shape of an object (geometry only). G-code contains line-by-line movement instructions for your specific printer (temperatures, speeds, positions, extrusion amounts). STL describes what to print. G-code describes how to print it.

Comments ()