If you’re struggling to keep the bed of your Ender 3 (Pro or V2) properly leveled, or if you’re new to 3D printing and just can’t seem to get it right—especially when the filament refuses to stick—then this guide is for you.
In this article, I’ll walk you through common issues that can interfere with bed leveling, such as X-axis sag and bed wobble, and show you how to fix them. I’ll also cover the process of leveling your bed, how to handle a warped bed (which is a common issue with the Ender 3), and offer some helpful tips to make everything easier
What does it mean to level a 3D printer bed?
Leveling a 3D printer bed is the process of ensuring that the nozzle maintains a consistent distance from the bed across the entire build surface. This is crucial for achieving a properly adhered and even first layer in your prints.
Many beginners mistakenly think “leveling” means making the bed perfectly horizontal using a level tool, but that’s not the case. Instead, the goal is to adjust the bed so that the nozzle is always the same distance from it, preventing issues like filament not sticking or uneven prints.
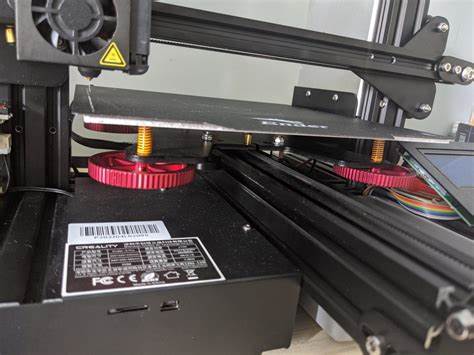
Most printers, like the Ender 3, use manual leveling knobs or auto-bed leveling sensors to fine-tune this distance. A well-leveled bed can significantly improve print quality and reduce failed prints!
How to Level the bed of an Ender 3
If you’re new to 3D printing, bed leveling will likely be one of the trickiest parts to master. However, once you get the hang of it, you’ll be able to do it quickly and reliably—provided no other issues, like X-axis sag or bed wobble, are interfering.
Important note: Always heat the bed before leveling it. Heat causes the bed to expand, and if you level it while cold, it will shift as it warms up, changing the nozzle-to-bed distance and affecting your print quality. To avoid this, preheat the bed to the temperature required for your chosen filament before leveling. Different materials require different bed temperatures, so always adjust accordingly. For example, PLA typically requires 60°C, while ABS needs around 110°C.
Steps to Leveling the Bed on Your Ender 3:
- Rotate the adjustment wheels counterclockwise to lower the bed as much as possible.
- Press the knob near the display to activate the menu, then navigate to “Prepare” > “Preheat PLA” > “Preheat PLA” to heat the bed and nozzle.
- Note: The bed temperature should match the filament type you’re using, so set it accordingly before leveling.
- Home the printer by going to “Prepare” > “Auto Home” to ensure the nozzle is correctly positioned for leveling.
- In the menu go to “Prepare” and then click on “Disable Steppers”. This will disable the stepper motors allowing you to move the hotend and the bed freely.
- By moving the bed as well as the hotend, place the nozzle right above the leveling screw on the front-left of the printer.
- Start by placing a regular sheet of paper on the print bed beneath the nozzle. Some users prefer a folded sheet, but a single layer works just fine. Turn the adjustment wheel clockwise while gently moving the paper back and forth until you feel a slight resistance—the nozzle should grip the paper slightly but not trap it completely.
- Important Note: Adjusting the other leveling screws will impact the first one. Since the bed’s other corners are initially low due to tightening the adjustment wheels, raising them later will bring the first corner too close to the nozzle. To compensate, turn the adjustment wheel on that first corner clockwise by 1/4 of a turn.
- Next, move the hotend to the right, positioning it directly above the leveling screw in the right corner. Place the paper between the bed and nozzle, then turn the wheel counterclockwise while moving the paper until you feel the same slight grip. Repeat this process for the two back corners, always positioning the nozzle directly above the screws.
- Finally, it’s time for fine-tuning. Return to the first corner, place the paper under the nozzle, and make small adjustments by turning the wheel slightly—no more than 1/4 of a turn—until the paper feels lightly gripped. Repeat this process for all four corners at least two or three times until the bed is evenly leveled.