Skip to content
Step 1: Download pfSense
- Go to the official pfSense website.
- Select the latest pfSense ISO for AMD64 (64-bit) architecture.
- Choose the USB Memstick Installer format.
- Pick a mirror site and download the ISO file.
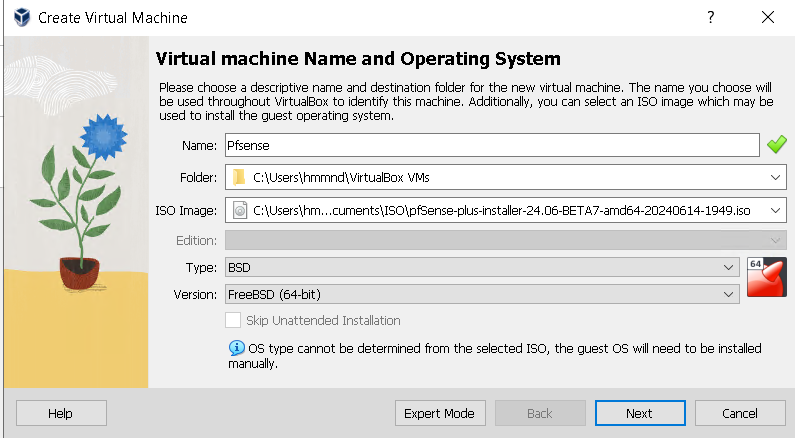
Step 2: Create a Virtual Machine in VirtualBox
- Open VirtualBox and click New.
- Name the VM pfSense, set Type to BSD, and Version to FreeBSD (64-bit).
- Allocate at least 1GB RAM and 10GB storage.
- Configure two network adapters:
- Adapter 1: Set to Bridged (WAN).
- Adapter 2: Set to Internal Network (LAN).
- Attach the pfSense ISO to the VM and start the installation.
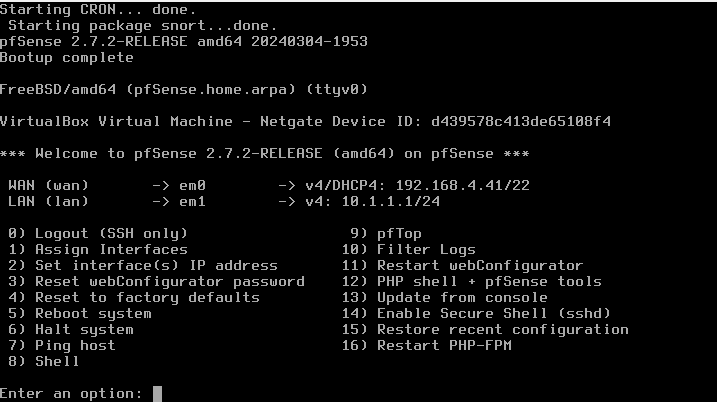
Step 3: Install pfSense
- Boot the VM and follow the installation prompts.
- Choose Auto (ZFS) for disk partitioning.
- After installation, remove the ISO and reboot.
- Access the pfSense Web GUI via
https://10.1.1.1 your ip may differ
- (default credentials:
admin / pfsense).
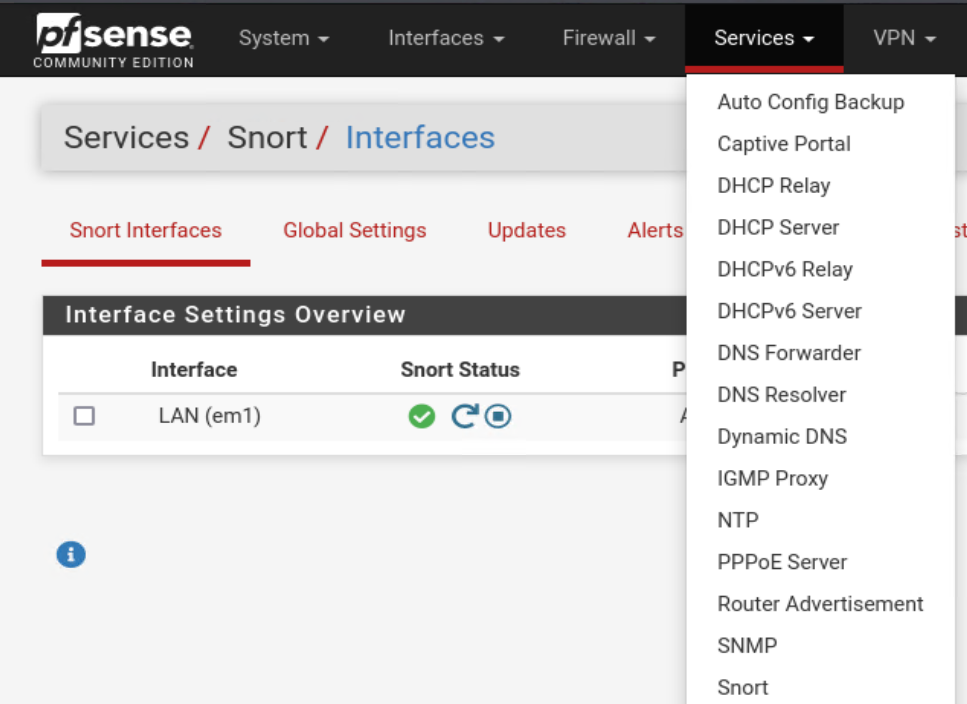
Step 4: Install Snort on pfSense
- In the pfSense Web GUI, go to System > Package Manager.
- Click Available Packages and search for Snort.
- Click Install and wait for the installation to complete.
- Navigate to Services > Snort and configure:
- Enable Snort VRT rules (requires an Oinkcode).
- Set up WAN/LAN interfaces for monitoring.
- Adjust alert thresholds and rule updates.
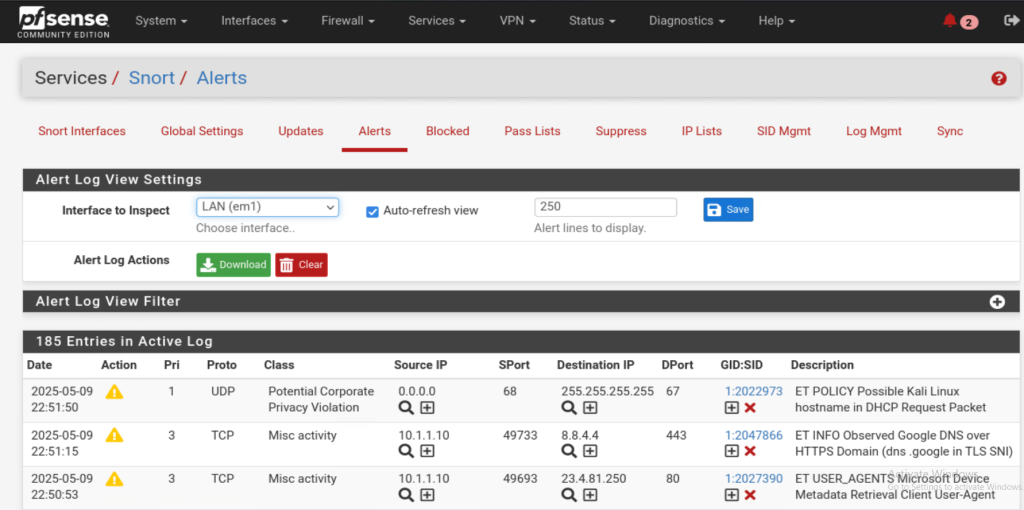
Step 5: Test Snort
- Generate test traffic using Kali Linux (e.g.,
nmap scans).
- Check Snort alerts in the pfSense dashboard.
- Fine-tune rules to optimize detection.